Strategy March 07, 2018
Common Digitizing Mistakes and How to Avoid Them
Something as small as having a decimal misplaced in your digitizing settings can have a devastating effect on your final product.
Digitizing for embroidery is a highly detailed process. While sophisticated, modern digitizing software has made the job easier, it hasn’t eliminated the digital landmines that even experienced programmers can trip over. Even a basic program with simple art can have hundreds of settings and plot points that need to be properly assigned. One slight misstep, or a decimal in the wrong place, can have a dramatic impact and cause a design to fail.
Different software packages take different paths to get to the same endpoint, and a setting that’s inappropriate in one software title might be OK in another. I am trained in Melco DesignShop, Wilcom and Pulse digitizing software. All three are excellent packages, but each has its own specific set of rules the programmer must follow. Since I learned how to program on Melco systems back when electricity was new, DesignShop is my tool of choice, and all examples/images shown in this column are presented with screen shots from DesignShop.
Digitizing errors come in five primary flavors; setting errors, using a tool in a wrong way, misplaced stitches, improper use of tools and programming sequence. Let’s take a quick look at each of these.
1. Settings
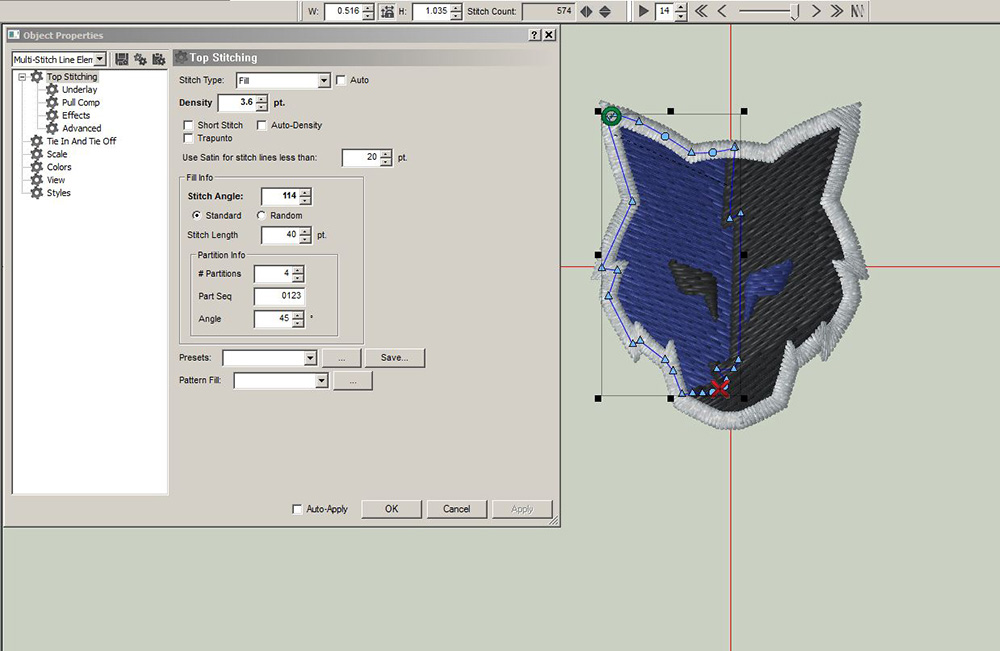
Each software package has a settings panel that controls any number of design elements from Top Stitch Density to Underlay Stitch Length and everything in between. Each setting can have a dramatic impact on the quality of a design. Getting each setting right is important.
Consider this simple design properly programmed at 2,038 stitches with the primary fills set to sew at a density of 3.6. If the density is accidentally set to 6.3, the stitch count would reduce to 1,673 with a very sparse stitch pattern.
2. Using a tool in a wrong way
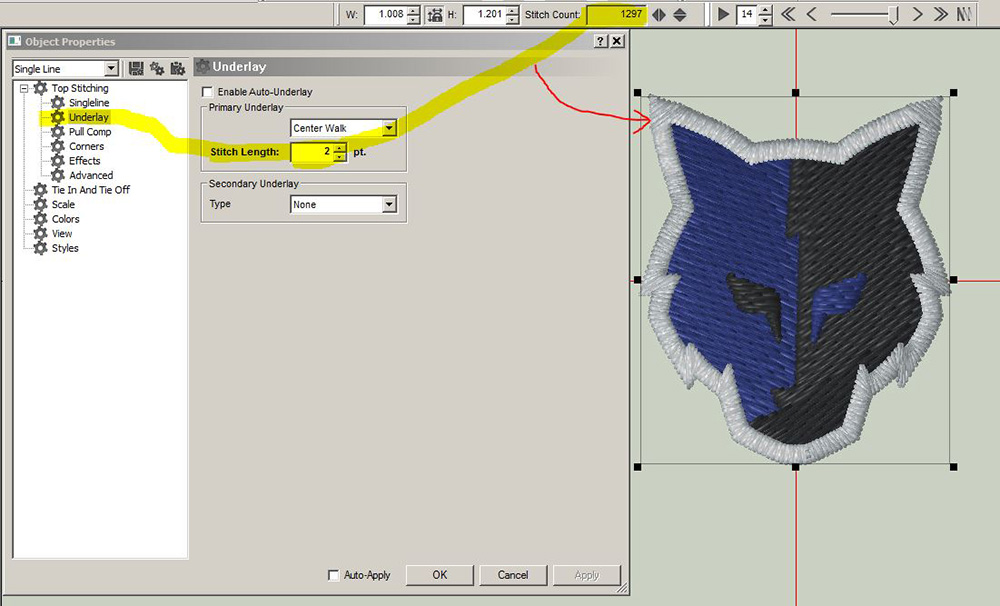
For this example, let’s consider underlay settings. All commercial-grade digitizing software allows you to “auto-apply” underlay settings. Underlay comes in several different types, and each has its own subset of settings. Similar to your top-density settings, you can enter a stitch length for a common walk-stitch underlay. Stitch length is similar to density in that the smaller the number, the closer together the stitches will be. In this example the proper setting is 20 points. If this setting is accidentally set to 2 points, the overall stitch count of this border stitch changes from 772 stitches to 1,297, and a close examination of the actual design would show that the underlay stitches are so close together there would be significant issues at the embroidery machine in the form of thread breaks and maybe even needle breaks.
3. Stitches placed in the wrong location
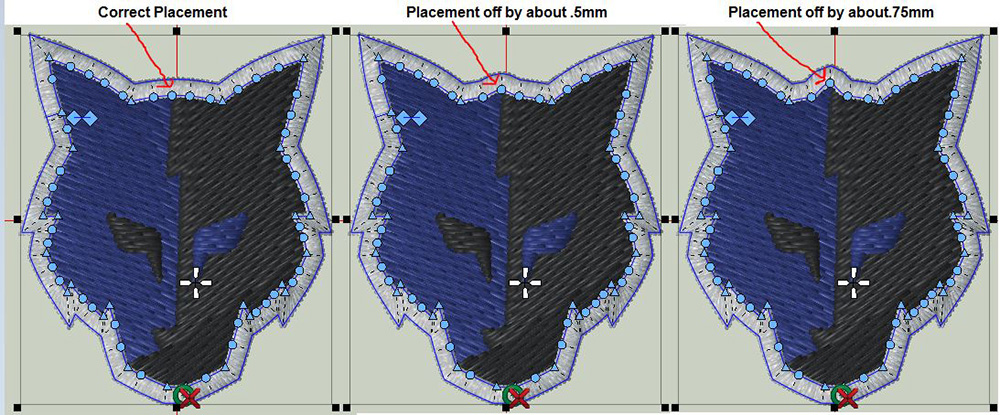
Proper digitizing requires precision. For this example, I exaggerated incorrect stitch placement to illustrate my point. However, it should be noted that the smallest misplacement of a stitch can result in significant quality issues. Quick note: When programing, you’re not really setting stitches. Rather, you’re using “points” to create an outline, and the computer fills in the stitches when you tell it to. When I talk about setting stitches, I’m really talking about setting points, but the end result is the same. A misplaced point will dramatically impact your design.
4. Improper use of tools
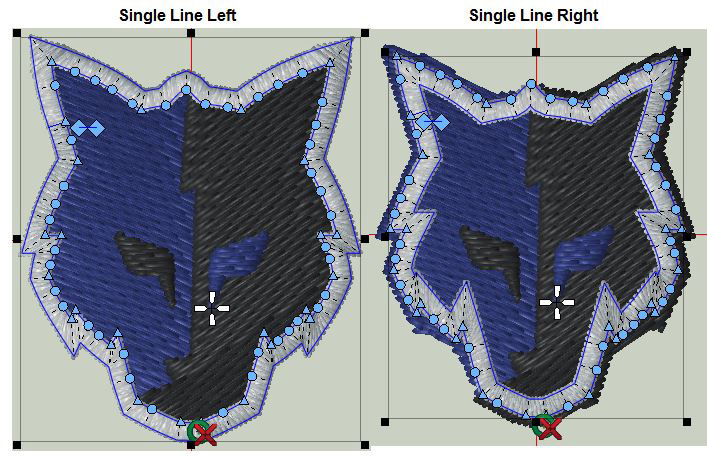
Auto-tools can be wonderful, and when properly used, they save a digitizer a ton of time, but when used incorrectly, they’ll cause a design to fail. Fortunately, in this case, the failure is obvious and easily correct. For this example, the programmer used an auto-tool to program the border that goes around the fox’s face. The tool used is called “single line left” and will place a nice, consistent border along the path the programmer has drawn. A quick examination of the related image shows the difference between a setting of single line left and single line right. It should be readily apparent which tool is correct for this design.
5. Programming sequence

This design is intended for use on caps. That means specific protocols should be followed. The design should embroider from the bottom up and where possible center out. That means the bottom text should embroider first, and it should sew, YXOF then TOOLS. It can be argued that the border should sew immediately after to allow for better registration fills, but on a small design like this, it should be OK to program the border last, assuming proper technique for placing the border stitches. In this case, I would program the border last, so the design would have one fewer color stop by combining element 3 and 4 in one color stop.
While programming a design can be a very artistic and subjective process, there are rules that must be followed to ensure the design will stitch properly. These examples only scratch the surface. What’s most important taking the time to learn how different settings affect your designs.
***
Steve Freeman is the managing partner of Qdigitizing.com. He has been a professional digitizer since 1989 and is trained on Melco, Wilcom and Pulse software systems. You can reach him at steve.freeman@qdigitizing.com or (877) 733-4390.
